
|
TrueCrypt - Encrypting an Existing DriveTrueCrypt is a software that can help you encrypt your data, thereby keeping your data secure. There are many ways to use TrueCrypt, but one of the most common question is "how to encrypt your existing data drive?" The classic answer has always been: 1) encrypt an empty drive; and 2) copy the data to the new encrypted drive. That's because previously, TrueCrypt couldn't encrypt an existing drive. Now there is a way and this article details the process. RequirementsThe catch is that you can't do it on all operating systems and you can't do it with all TrueCrypt versions. First of all, you should get the latest version of TrueCrypt. As of this writing, TrueCrypt version 7.1a can encrypt an existing data drive in place. Second, you need an operating system that can perform the encryption on an existing drive. With Windows, you'll need Windows Vista or greater. Any previous Windows version cannot perform this task. For example, if you attempt to perform in-place encryption on Windows XP, you'll get the following error message: 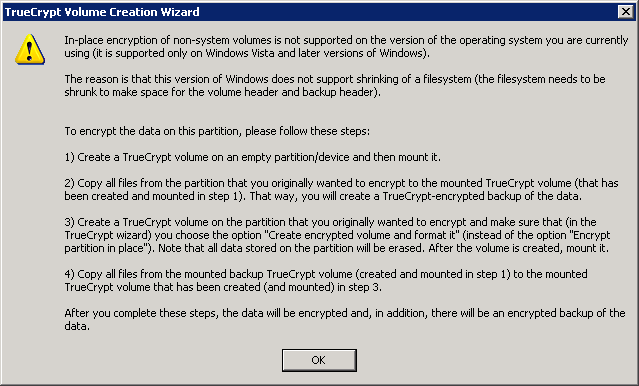
ProcedureOnce you have the requirements down and have a system that meets the requirements, then it's time to get started with encrypting your existing data on your existing drive. First, of course, you'll have to install TrueCrypt on you computer if you haven't already. If you already did, then launch it. The screen shot below shows the main TrueCrypt screen. 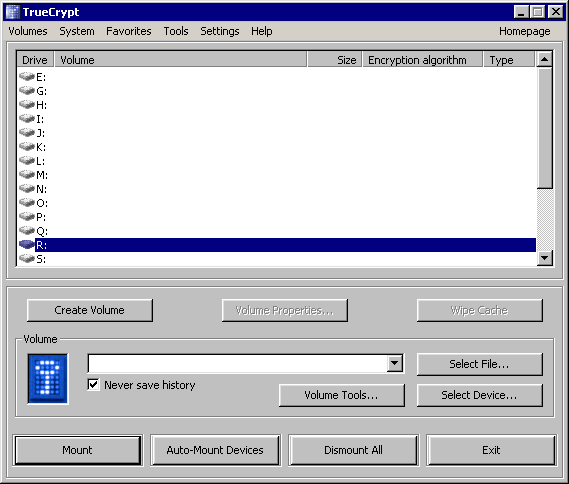
On the main screen, click the "Create Volume" button to get started. The following "Volume Creation Wizard" will pop up. 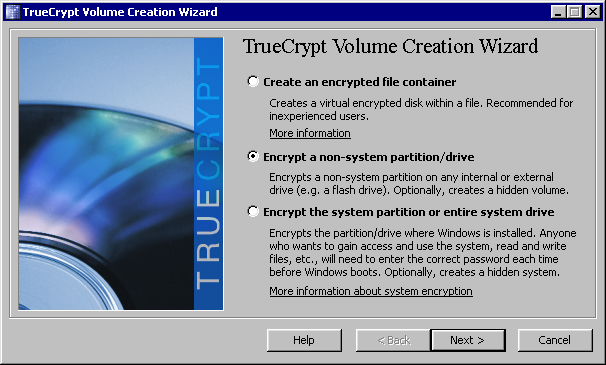
Select "Encrypt a non-system partition/drive". We are assuming you are encrypt an entire drive that only contains your sensitive data. If you are encrypting your primary hard disk, then select the last option. Click the "Next >" button to continue. On the next screen (see screen shot below), select "Standard TrueCrypt volume". If you are more advanced user, you can select the "Hidden TrueCrypt volume". But that's details for another article. Click the "Next >" button to continue. 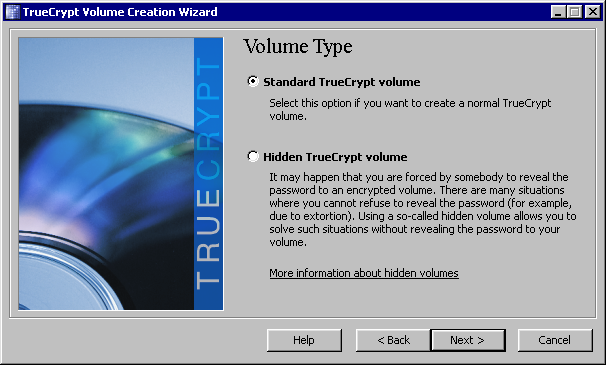
On the next screen, shown in screen shot below, it ask you to select a device. Use the "Select Device..." button to choose the drive you want to encrypt. Once you have selected the drive, push "OK". The click the "Next >" button to move on. 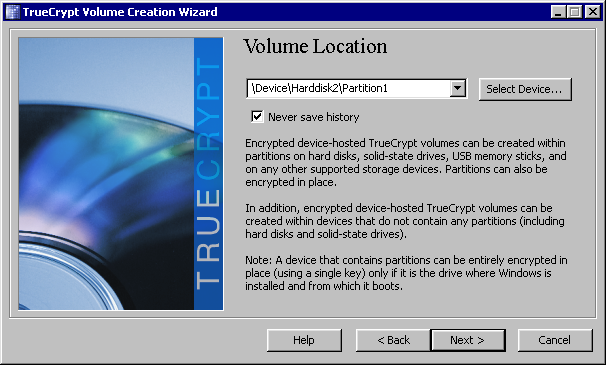
This next dialog (screen shot below) is the key to this entire article. Here, you tell TrueCrypt whether you want to start with a new encrypted drive or encrypt an existing drive. Be sure to select "Encrypt partition in place". Otherwise, you will wipe your data drive. Double check this screen before proceeding. Once you selected the right option, click "Next >" button to continue. 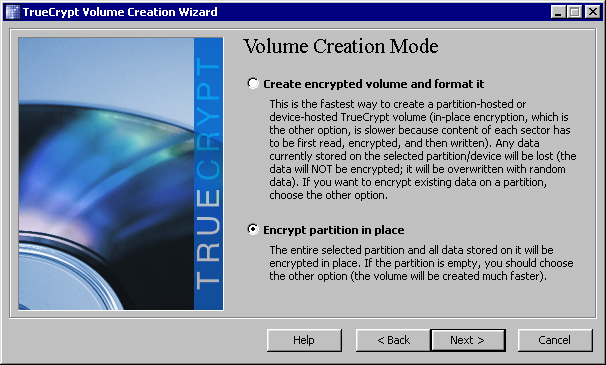
A warning dialog will pop up as shown in the screen shot below. The warning makes it clear to you that in the event of a power outage or a system crash during the encryption, you will lose data! Before you continue, make sure you have a back up copy of the drive before continuing. If you do not, make sure to click the "No" button at this time. On the other hand, if you have a backup and wish to continue, click the "Yes" button. 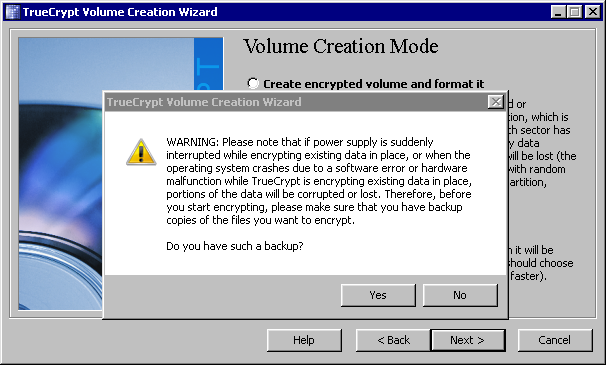
The next dialog allow you to select your encryption algorithms. Each encryption method has its advantages and disadvantage. It's too much details to go into this article. So please do you own research. You are welcome to pick the default and continue by clicking the "Next >" button. 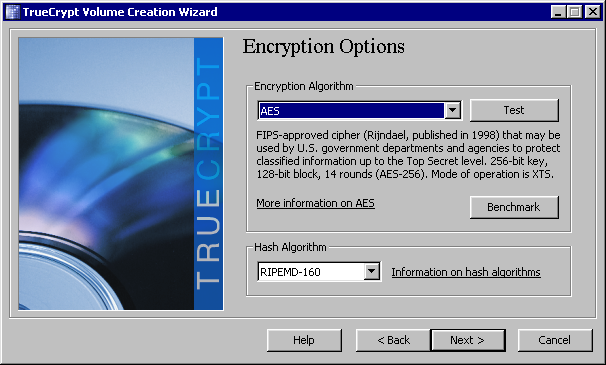
In the next dialog (see screen shot below), enter the password for your encrypted drive. You'll need to remember this password in order to access your data on the encrypted drive. After entering your password, click "Next >" to continue. 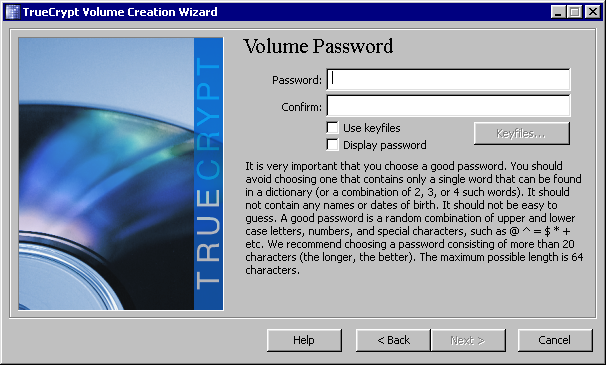
In the next dialog, shown in the screen shot below, TrueCrypt will use your mouse movement to create cryptograph for your key. Move your mouse within the dialog as much as you wish. Then click the "Next >" button to continue. 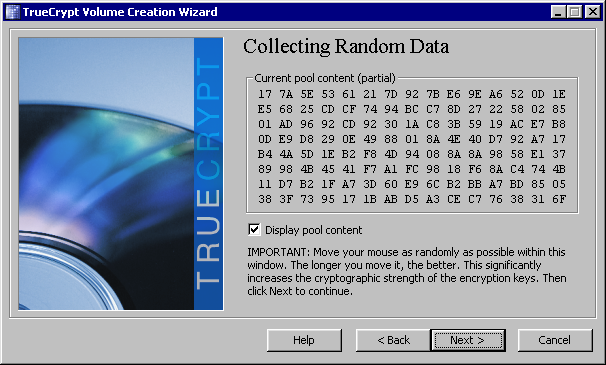
The next dialog (see screen shot below), TrueCrypt will ask you for the wipe mode. The default is "None (fastest)". It's sufficient for most purposes. But if you are worried about residue data that can be recovered, follow the instructions and choose a different mode. Click "Next >" button to move to the next screen. 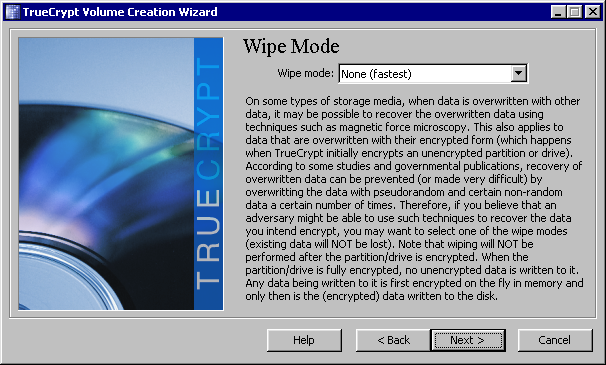
On the next screen (see screen shot below), you get to select the Encryption Wipe mode. Use the instruction earlier to make your decision on the "Wipe mode". Then click "Encrypt" button to start the process. 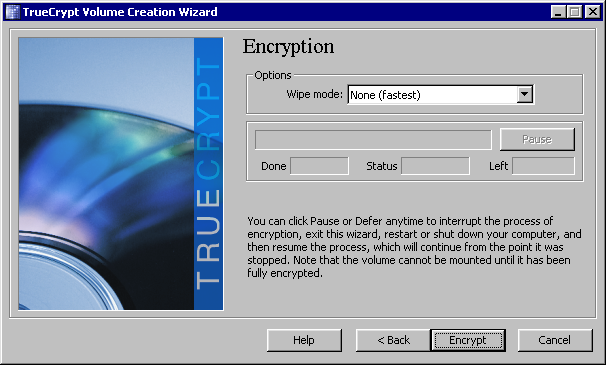
Related Links
Attachments
|
Articles
|
Wiki
180 Users Online
|
|
Copyright © 2004 - 2025. All Rights Reserved. |