
|
Adding a Bluetooth Thermal Label Printer to Microsoft Windows 11Most Bluetooth thermal label printers are marketed to be used with Android SmartPhones or iPhones. So the instruction manuals only provides steps to connect to these devices and not to a personal computer. For personal computers, the manuals usually refers to using the USB cable for connection. Some times, if you have a Windows computer with Bluetooth support, it would be really nice to print shipping labels on the other side of the room without having to tether a long USB cable to the printer. After some trial-and-error, I've figured out how to do it with most Bluetooth thermal label printers, which I will document here. These installation steps has been tested to work with the following Bluetooth thermal label printers. The steps will likely work with other Bluetooth printers as well.
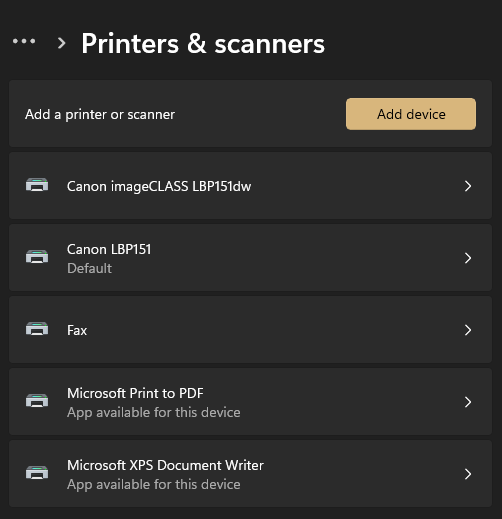
If you need a Bluetooth thermal label printer that works with your Windows PC, you can order one of these from Amazon via the links provided in the "Related Links" section below. Getting StartedThe first step is, of course, to unpack your Bluetooth thermal label printer and get it ready to go. The printer needs to be plugged into the AC outlet and turned on. You may also insert your labels into the printer so that it's ready for testing once you have gone through the installation steps. Do NOT connect the printer to the computer via USB cable. You should boot up your Windows computer and have it ready to go. Make sure your Windows computer's Bluetooth is turned on. You'll need it starting with the next step. You'll also need the printer manual and the driver handy. The printer usually comes with a flash drive that contains the driver. Pairing the Bluetooth Printer to the ComputerOn your Windows PC, open up "Settings". You can do that by right-clicking on the Windows menu icon and then click on "Settings". Now, click on "Bluetooth & devices". Then click on "Printers & scanners". Finally, click on the "Add device" button as shown in the screen shot below. 
If Bluetooth is enabled on your computer and the printer is turned on, you should see it show up. The screen shot below shows my computer sees the JK-402A Bluetooth Thermal Label Printer. 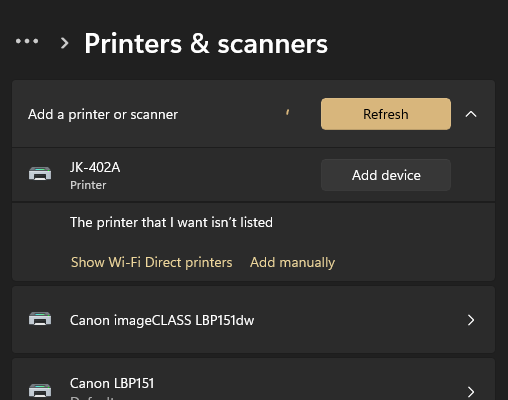
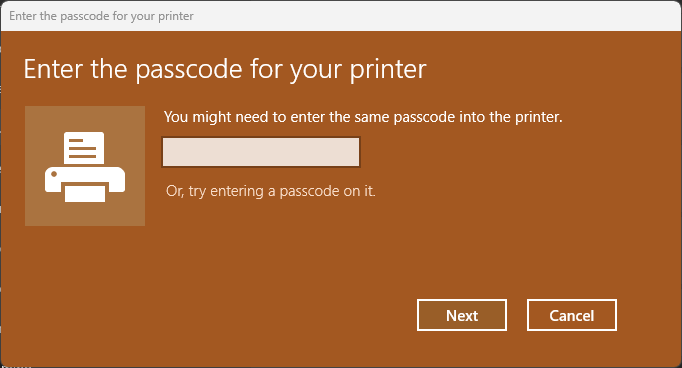
Click on the "Add device" button next to the Bluetooth printer. The computer will spend a few seconds communicating with the printer via wireless Bluetooth. Then you will see the following dialog asking for a passcode for the printer. 
The passcode for the JK-402A Bluetooth Thermal Label Printer is "0000". Refer to the user manual of your printer for the correct passcode. Enter the passcode and click on the "Next" button. Windows will spend about half a minute pairing with the printer. When it's done, you'll see that the printer has been added to the list like the screen shot below. 
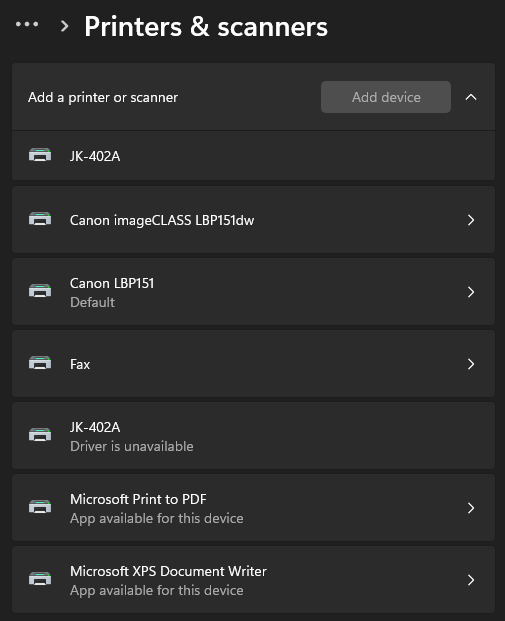
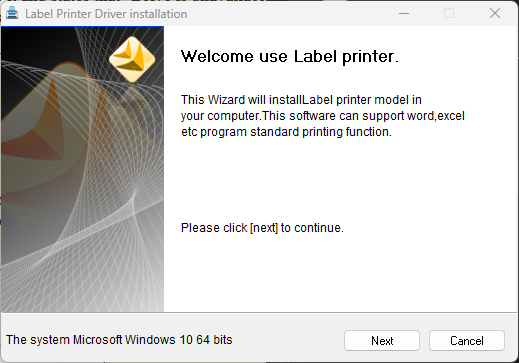
In the case of the JK-402A, Windows could not find a driver for it and states that "Drive is unavailable". That's ok, because this is just the pairing step. We'll need to install the driver in the next step. If you are installing a different Bluetooth printer, Windows may install the driver automatically. If that's the case, you can skip the next step. Installing the Printer DriverThe JK-402A printer's driver installer is called "KCPrinterSetup.exe". Your printer's driver installer may be named differently. Double-click it to launch the installer. After launching, the installer will ask you your preferred language as shown in the screen show below. 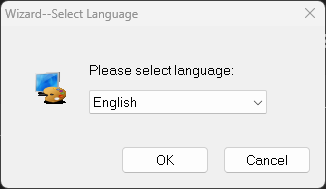
Of course, select the language of your preference and click the "OK" button. The next screen is just an introduction and not very useful (see screen shot below). Just click the "Next" button to get on with it. 
The next screen asks you to choose installation folder. A default path will be provided as shown in the screen shot below. If you have a better installation location, you can enter it, then click "Next". Otherwise, just go with the default and click the "Next" button. 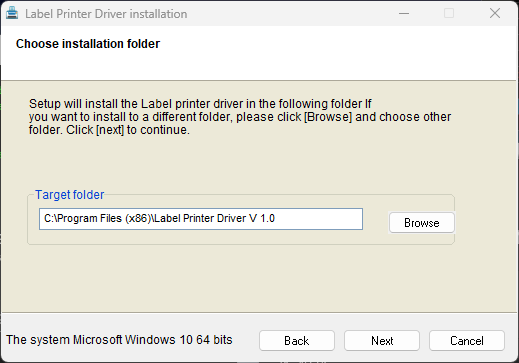
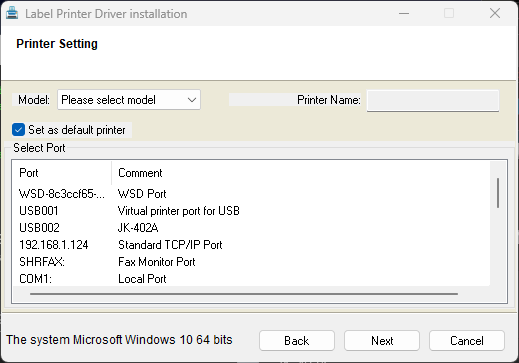
The next screen presents you with printer settings as shown in screen shot below. 
You'll select "JK-402A" for "Model:". Although the screen shot shows "USB002 JK-402A", do not select that. It shows up on a USB port because I had installed the printer as a USB printer prior. Instead, most Bluetooth printers are attached virtually via COM4 port. Therefore, select the "COM4: Local Port" option as shown in the screen show below. You can change this COM port later; see the "Cross-Reference" below. Finally, click the "Next" button to continue. 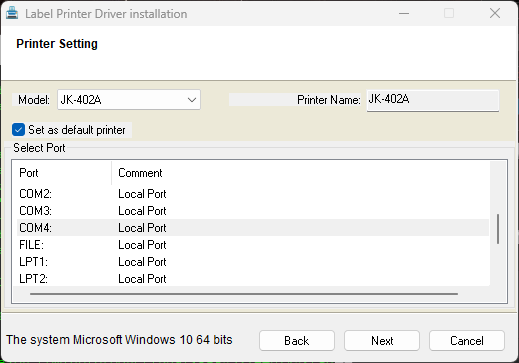
Cross-Reference
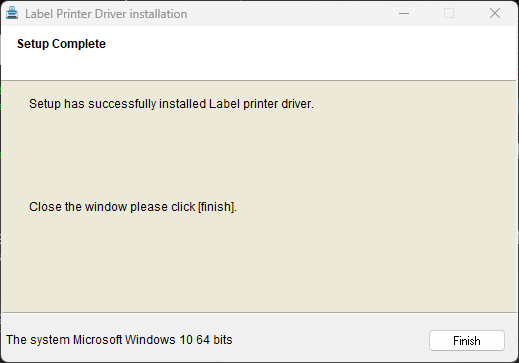
The installer will proceed to install the driver for the printer. When it's done the setup complete screen will be presented as shown in the screen shot below. Click "Finish" to complete the driver installation. 
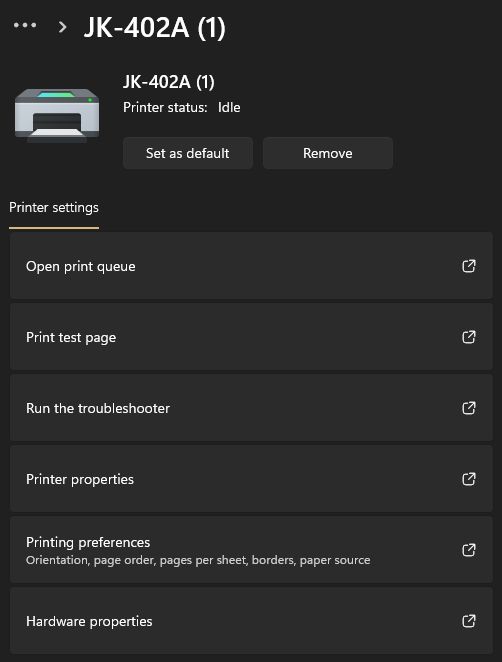
On the "Printer & scanners" page, you'll now see a new printer entry as shown in the screen shot below. Normally, this printer driver will also be named "JK-402A". But in this case, it's name "JK-402A (1)", because I had installed it prior. 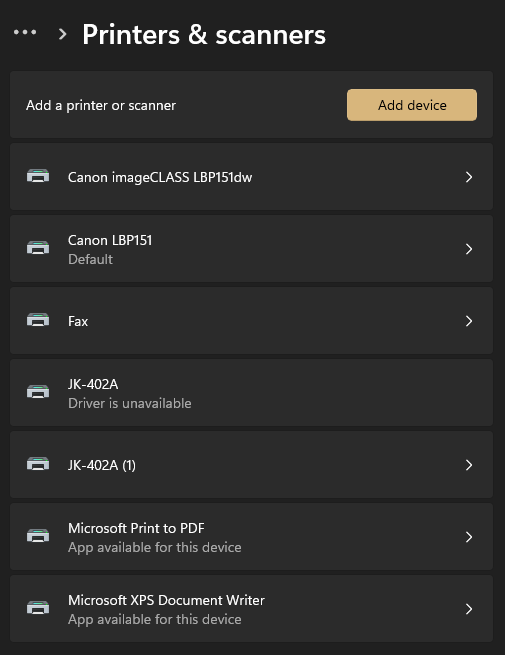
You can ignore the "JK-402A Driver is unavailable" entry, but do NOT delete it. That entry is the physical device pairing. It's absolutely needed. If you delete it, then you'll have to start the installation all over again. Continue to the next section to configure the printer driver and change its name. Configuring the Printer DriverTo configure the printer driver, click on the "JK-402A (1)" entry. You'll see the screen below. 
Click on the "Printer properties". You'll be presented with the Properties dialog as shown in the screen shot below. You'll be able to change its name and other settings here. A year from now, I may not remember which printer is "JK-402A", so I definitely want to change it to something more descriptive like "JK-402A Thermal Label Printer". You can enter it in the text box next to the printer icon and push "OK". 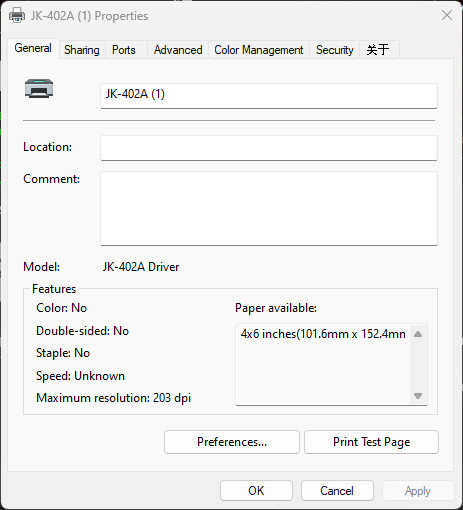
Next, click on "Print preferences" from "Settings". You'll be presented with a dialog below. The printer is a 4"x6" label printer. So select "4x6 inches(101.6mm x 152.4mm)" from the pull down next to "Paper Name". Once satisfied, click on the "OK" button. 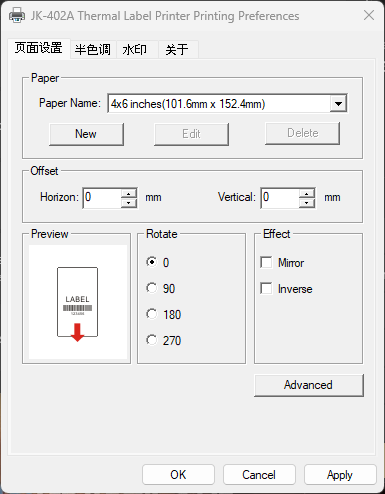
You have just completed the Bluetooth thermal label printer set-up. Now you can start printing label from your Windows computer via wireless Bluetooth. Related Links
Attachments
|
Articles
|
Wiki
173 Users Online
Get Our

|
|
Copyright © 2004 - 2025. All Rights Reserved. |
|


