|
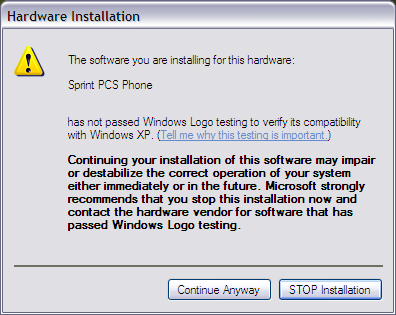
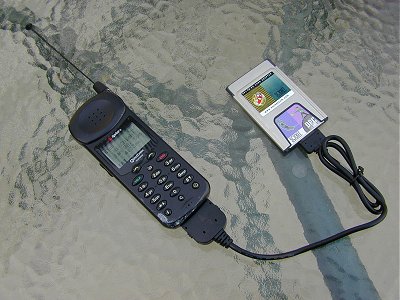
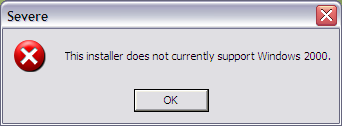
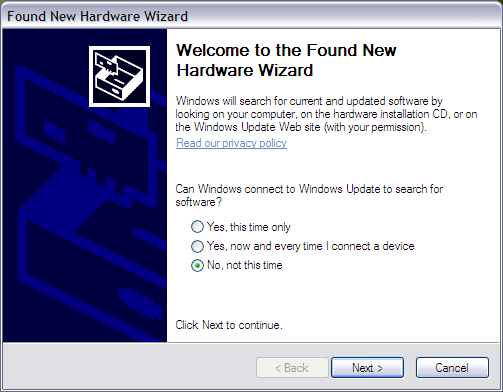
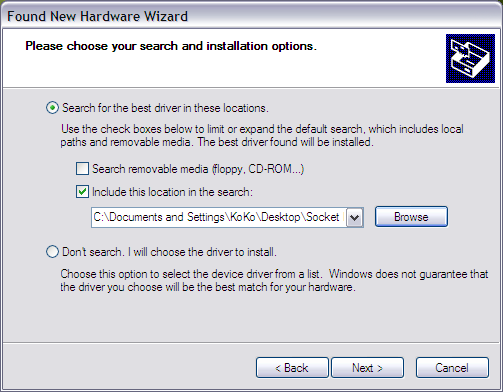
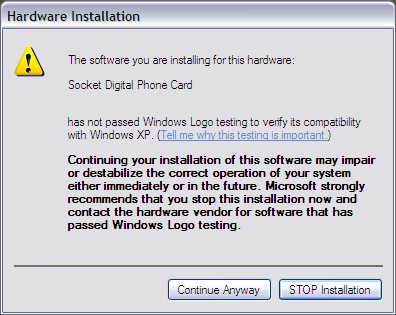
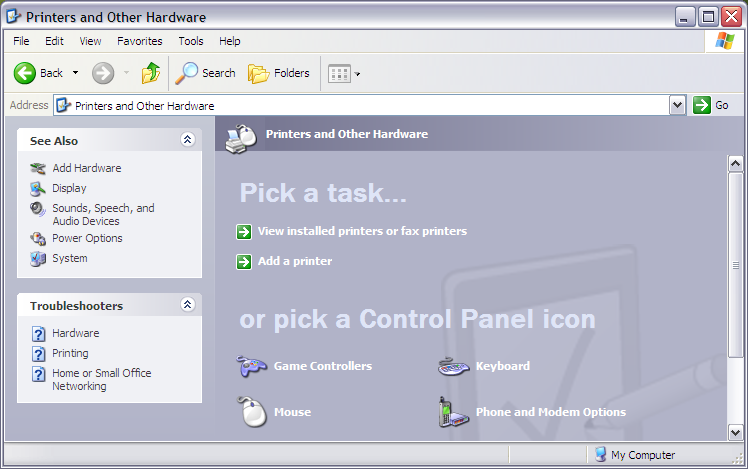
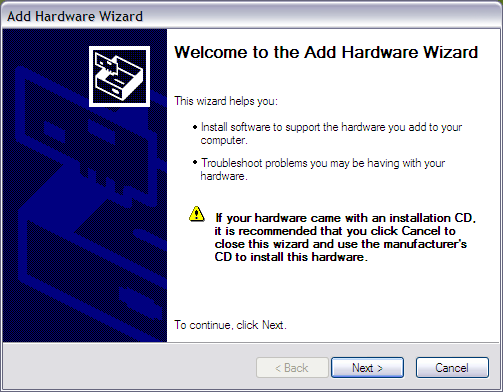
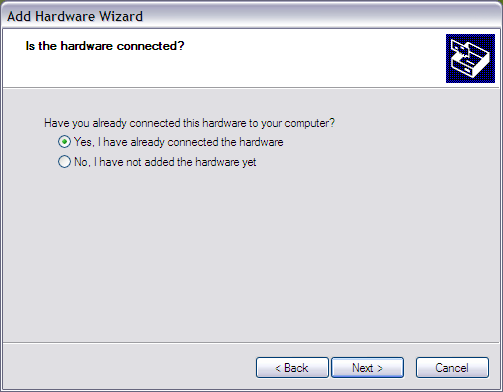
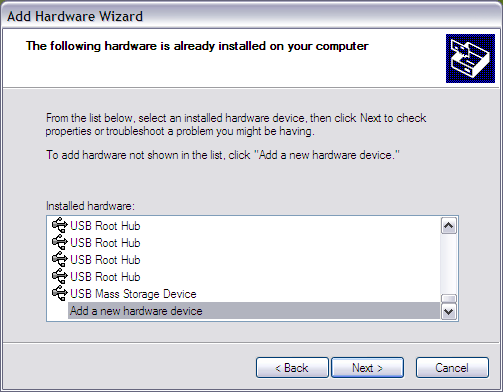
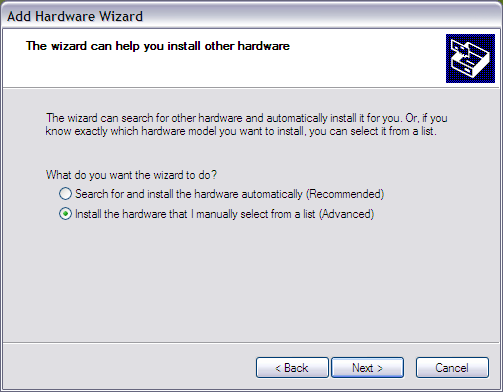
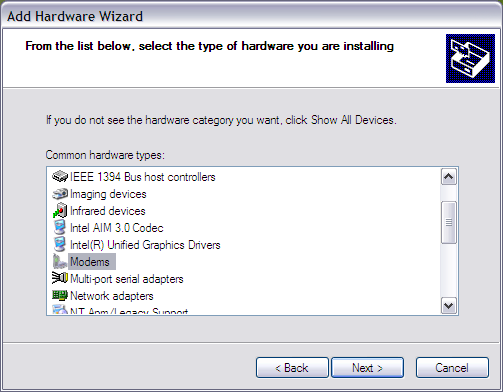
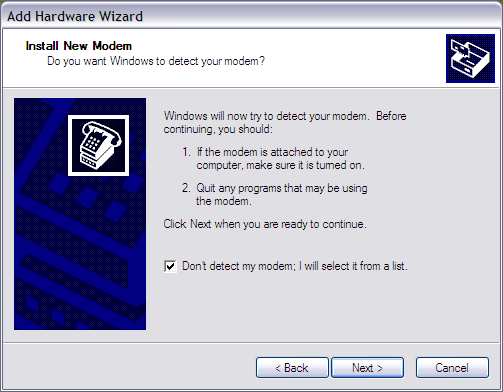
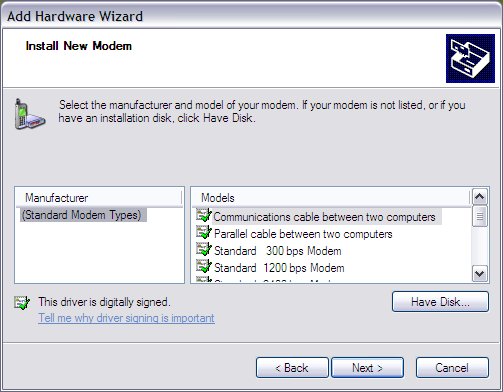
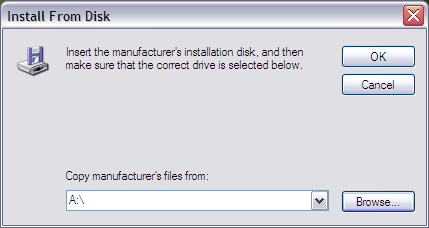
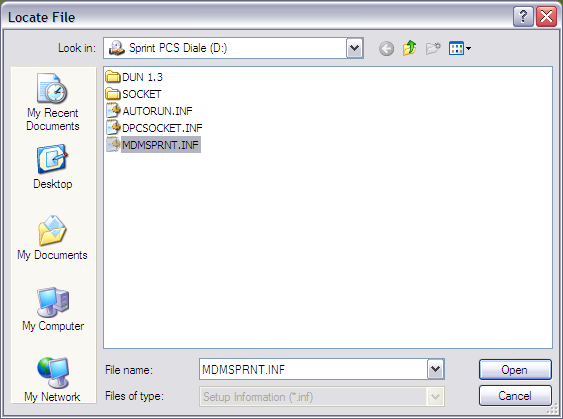
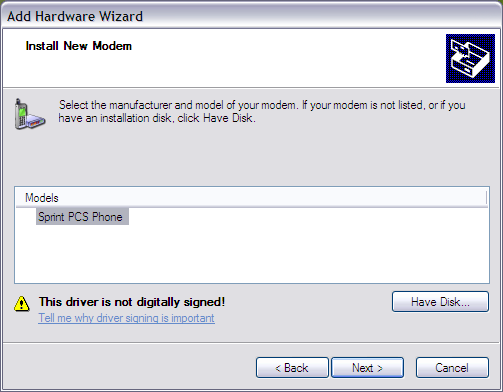
Setting up Sprint PCS Wireless Web Connection Card Kit on Windows XPStarting with the Qualcomm QCP-2670 first generation CDMA phone, Sprint PCS phones has the capability of wireless web access. And ever since I had the QCP-2670, extra batteries, and the Sprint PCS Wireless Web Connection Card Kit, I have never switched my cellphone. For $5, Sprint PCS allows you to use the wireless web as much as your minutes allowed for free. With an unlimited nights and weekend plan, I can get on the web from anywhere for no charge. For the longest time, I have used this cellphone with my Sony VAIO SuperSlim PCG-505TS notebook running Windows 98. They are an excellent combination. But recently, I have become fed up with the blue screen of death on Windows 98 and have replaced it with Red Hat Linux 8. I don't regret that decision at all, but it meant I could no longer access the web through my Sprint PCS phone. You see, the Sprint PCS Wireless Web Connection Card Kit software installer will not install to anything other than Windows 95 and 98. So my HP Pavilion dv1227us notebook running Windows XP doesn't have the privilege of accessing the Internet with my QCP-2670 phone. I changed that last night by spending some time working out a way to get my Windows XP to recognize my phone without going through the installer. The rest of this article will document that process. Attached Image: Chieh Cheng If you have ever tried to install the Sprint PCS Wireless Web Connection Card Kit software on anything other than Windows 95/98, you'll see a dialog box pop-up saying that "This installer does not currently support Windows 2000.", as shown in picture below. Don't bother trying harder with the installer. Even the Windows XP legacy compatibility mode (see "Running Win 95/98 only applications on Windows XP" thread elsewhere on this site) doesn't work. That is because Sprint PCS Wireless Web Connection Card Kit software looks for the old Dial-Up Networking and the old TCP/IP stack. Instead, follow the instruction below to set-up your Digital Phone Card for Windows XP. Attached Image: Chieh Cheng Before you start, find the Sprint PCS Wireless Web Connection Card Kit software CD-ROM. The CD-ROM contains all the Windows hardware configuration files (INF) that you'll need. Insert the CD-ROM into your drive. Ignore the auto-run application by closing it. Note Now, insert the Socket DPC Digital Phone Card into the PCMCIA slot of your notebook computer. You'll see the Found New Hardware Wizard dialog pop-up on your screen (see picture below). When the wizard asks you whether it can connect to Windows Update to search for software, select "No, not this time." And press the "Next >" button to continue. Attached Image: Chieh Cheng In the next dialog box (see picture below), the wizard asks you for the location to search for the driver. Check the box that says, "Include the location in the search". Then click on the "Browse" button and select your CD-ROM drive. Next, select the "dpcsocket.inf" file and click "Ok". When you are back at the wizard dialog, click on "Next >" to continue. Attached Image: Chieh Cheng The wizard will show that it found the driver for Socket Digital Phone Card (see picture below), but it will warn that this driver "has not passed Windows Logo testing to verify its compatibility with Windows XP". Click on "Continue Anyway" to complete the installation of the driver. Attached Image: Chieh Cheng At this point, your Socket Digital Phone Card driver is installed. However, you can't use it just yet, because you still need to install the modem driver for your Sprint PCS Phone. See the next step for details. Step 2: Installing Modem DriverAfter successfully performing Step 1 above, you'll need to install the modem driver for the Sprint PCS phone before you can access the web. To accomplish this task, we need to add a new hardware to Windows XP. You can do this by going to the Windows XP "Control Panel", then clicking on "Printers and Other Hardware". You'll see the dialog box shown below. Attached Image: Chieh Cheng Next, click on the "Add Hardware" on the left hand side under the "See Also" heading. When you do, you will see the Add Hardware Wizard welcome screen below. Then click the "Next >" button to continue. Attached Image: Chieh Cheng The "Add Hardware Wizard" will ask "Is the hardware connected?", as shown in the picture below. If your Sprint PCS phone is not connected to the DPC card that is already inserted into your computer, do so now. Then select "Yes, I have already connected the hardware". Then click the "Next >" button to continue. Attached Image: Chieh Cheng The "Add Hardware Wizard" will present a list of hardware that is knows are connected to your computer. Your Sprint PCS phone modem will not show up on this list. So scroll down to the bottom of the list and choose "Add a new Hardware device" (see picture below). Then click the "Next >" button to continue. Attached Image: Chieh Cheng The "Add Hardware Wizard" will offer to help you install other hardware. However, for the Sprint PCS phone modem, the "Add Hardware Wizard" is no help and will simply waste your time. Therefore, choose "Install the hardware that I manually select from a list (Advanced)" from this screen (see picture below). Then click on the "Next >" button to continue. Attached Image: Chieh Cheng The "Add Hardware Wizard" will ask you what type of hardware you are installing. Choose "Modems" (see picture below). Then click on the "Next >" button to continue. Attached Image: Chieh Cheng "Add Hardware Wizard" will be happy to install a new modem for you. In fact it is so zealous that it will try to help detect your modem for you. Unfortunately, it is not smart enough to figure out how to work with the Sprint PCS phone. So, you'll have to set it up manually. But luckily for you, you have this guide to follow. Select "Don't detect my modem; I will select it from a list.", as shown in the picture below. Then click on the "Next >" button to continue. Attached Image: Chieh Cheng In this step, the "Add Hardware Wizard" will present a list of modems that it knows about for you to select from (see picture below). Spring PCS phone modem is not on this list. So this is where the CD-ROM driver disc comes in. Click on "Have Disk�" Attached Image: Chieh Cheng An "Install From Disk" dialog box will pop up (see picture below). It asks you to insert the manufacturer's installation disk. Insert the driver CD-ROM at this time, if it isn't already in your CD drive. Now, click on the "Browse�" button to tell Windows XP which driver file it should use. Attached Image: Chieh Cheng The standard Windows XP "Locate File" dialog box will pop up (see picture below) after you click the "Browse�" button. Use it to navigate to your CD-ROM drive that contains the driver disc. Next, select the MDMSPRNT.INF file, which will tell Windows XP all the information it needs about the Spring PCS phone modem. After selecting the file, click on the "Open" button to continue. Attached Image: Chieh Cheng Once you have located the modem driver file, "Add Hardware Wizard" will show the "Sprint PCS Phone" in the "Install New Modem" dialog (see picture below). Even though it indicates that "This driver is not digitally signed!", you can ignore this message . . . unless you don't ever want to use your Sprint PCS Phone with your Windows XP . So, click "Next >" to continue. Attached Image: Chieh Cheng "Add Hardware Wizard" will then ask you which port you would like to install the Sprint PCS Phone modem. On my computer, only COM5 is presented (see picture below). You may have more options on your computer. Click on the port you would like to use, then click on "Selected ports". Finally, click on the "Next >" button to continue. Attached Image: Chieh Cheng The "Add Hardware Wizard" will warn you, again, that the driver for Sprint PCS Phone "has not passed Windows Logo testing to verify its compatibility with Windows XP." The message gets more serious, presented in bold, and really tries to scare you: "Continuing your installation of this software may impair or destabilize the correct operation of your system either immediately or in the future. Microsoft strongly recommends that you stop the installation now and contact the hardware vendor for software that has passed Windows Logo testing." If you follow the advice, you will never get your Spring PCS Wireless Web Connection Card Kit to work on Windows XP. You can try to contact Spring PCS for a verified version of this software, but you'll never get it. Sprint PCS has already ended the life-cycle for this phone and software product. They will ask you to spend more money and upgrade to their latest and greatest, such as Vision or EV-DO. So if you really want to use your existing equipment, just ignore this warning message and click on the "Continue Anyway" button. Attached Image: Chieh Cheng "Add Hardware Wizard" will proceed to install the modem driver. Then it will tell you that "Your modem has been set up successfully" in the picture below. Click "Finish" to conclude this step of installing the modem driver. In the next step, I will show you how to set-up Windows XP to dial the phone modem and connect to the Internet. Attached Image: Chieh Cheng
Did your message disappear? Read the Forums FAQ. Add Comment
TrackBackTrackBack only accepted from WebSite-X Suite web sites. Do not submit TrackBacks from other sites.
No TrackBacks yet. TrackBack can be used to link this thread to your weblog, or link your weblog to this thread. In addition, TrackBack can be used as a form of remote commenting. Rather than posting the comment directly on this thread, you can posts it on your own weblog. Then have your weblog sends a TrackBack ping to the TrackBack URL, so that your post would show up here. Messages, files, and images copyright by respective owners. |
Articles
|
Wiki
115 Users Online
Get Our

|
|
Copyright © 2004 - 2025. All Rights Reserved. |
|
 you want to install the modem on.png)