
|
Connect Windows XP Computer to the Internet Using the Samsung A900M Camera Phone
The Samsung A900M phone, with a Sprint PCS account, is a real marvel at broadband connection. Even its built-in browser is quite capable for accessing various web sites, such as this one. So it would be even better to use it as broadband access on your notebook computer. Basically you can have broadband Internet on the go. Using the Samsung A900M with your notebook computer is relative easy once you get it set-up. I have been using this set-up quite some times, and the broadband speed is pretty close to using your broadband at home. This guide will help you tether the Samsung A900M to your Windows XP computer for broadband Internet. USB CableThe Samsung A900M cellphone comes with an USB cable for connecting the phone to your computer. This cable is fine for the purpose of accessing the Internet. Unfortunately, this USB cable does not charge the cellphone at the same time. That means how long you can stay on the Internet is limited by the battery life. And the small battery that came with the phone doesn't last that long. There are two solution to the battery life problem. One, you can buy more batteries. Various vendors provide extended batteries that last far longer than the small battery that came with the phone. I listed several places and reviews on replacement batteries in the "Related Links" section below. Another solution to this energy problem is to purchase an USB cable that has the battery charging capability. With a USB cable that can transfer data and charge the phone at the same time, you can practically stay on the Internet 24/7 (assuming you have an unlimited airtime plan, that is). I've listed an excellent USB cable for this phone in the "Related Links" section. Which ever solution you choose, find the USB cable and have it handy. But do not plug your phone into the computer yet. Download the SoftwareAfter you've found the USB cable that you are going to use to connect your computer to your phone, you'll need to get the software that makes them work together. Download the A900M driver software from Samsung Wireless Phones Drivers. After you accept the license agreement, you will download the SPH-A900.zip to your computer. With Windows XP, you can automatically open the ZIP file and see its content by double-clicking on the ZIP file. If you can't see the content, download a free ZIP utility from the Info-ZIP web site (see "Related Links" below). Extract the "Samsung (MCCI Driver 4.16)" folder from the SPH-A900.zip file. In Windows XP, you can simply copy it out by drag-and-dropping the folder on your destination (say your desktop). Install the Software
Installing the driver software is easy. Open the "Samsung (MCCI Driver 4.16)" folder. Then click on "setup.exe" to run the software. I simply clicked "Next >" and "Yes" all the way through. If you are running Windows XP, during the installation, you are going to see a dialog box that says, "The software you are installing has not passed Windows Logo testing to verify its compatibility with Windows XP." (See screenshot below.) You are going to see this dialog box three times. Simply click on "Continue Anyway" each time. 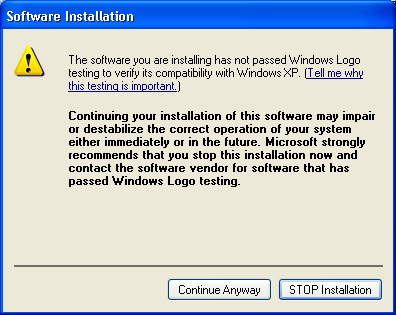
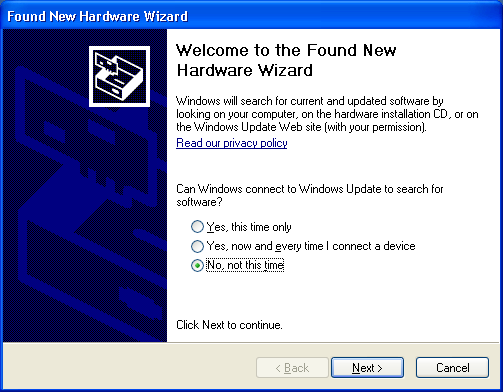
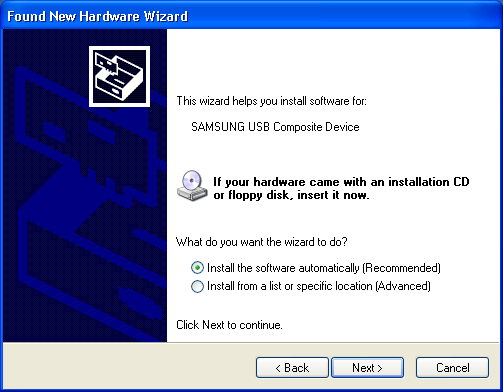
At the completion of the installation, the setup software asks you to restart your computer. You can either do it right then or do it later at your leisure. I've found that I didn't have to restart my computer at all to install the phone and complete the rest of the set-up process. But to avoid any additional problems you might encounter, restart is always a good advice. Connecting the Phone to Your ComputerNow, pull out the USB cable. You are now ready to connect the phone to your computer. But before you plug it in, choose the USB port you want the phone to connect to. The reason you want to choose now is because each time you plug it into a different USB port, you have to re-perform the process outlined in the rest of this article. If you can stick to one convenient USB port, you're life will be easier. After all, you wouldn't want to mess with installing the phone while you are on the road. After picking the USB port you want to use, plug the USB cable into the phone and then into the computer. The "Found New Hardware Wizard" will pop-up soon after as shown in the screen shot below. It will ask you whether to "connect to Windows Update to search for software?" Choose "No, not this time"; you have already downloaded and install the software in the previous steps. 
Next, Windows will ask if it could install the "SAMSUNG USB Composite Device" automatically (see screen shot below). Choose the first option. 
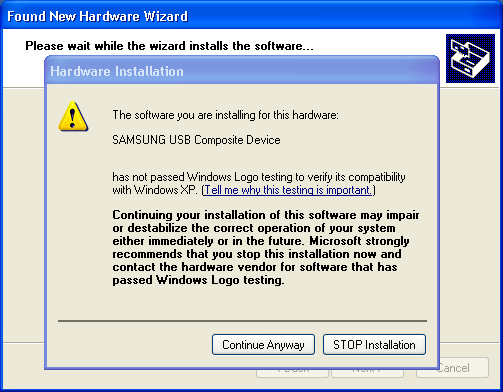
Windows will warn you that the "SAMSUNG USB Composite Device" driver has not passed the Windows Logo testing (see screen shot below). Ignore this warning and press "Continue Anyway" to proceed with the installation. 
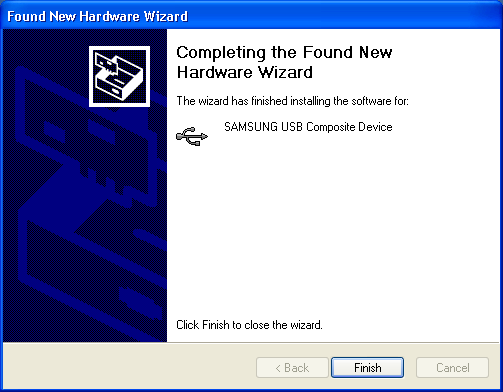
After installing the driver, you will see the wizard completion dialog shown in the screen shot below. Click "Finish". 
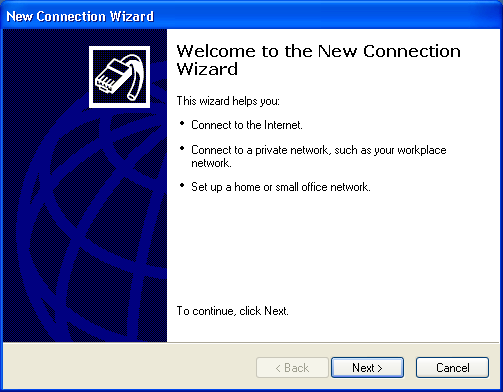
Right after you click the "Finish" button, the "Found New Hardware Wizard" will start up again. But this time, it's for the "SAMSUNG CDMA Modem". Don't worry, it's normal. Windows needs to install two device drivers for this phone: 1) USB driver; and 2) modem driver. Go through the same steps outlined above to install the modem driver. After installing both drivers, Windows XP will happily notify you that "Your new hardware is installed and ready to use." Set Up Network ConnectionsAfter connecting the phone to your computer, you now need to set up a network connection to access the Internet at broadband speed. Click on the "Start" button and select "Control Panel". Double-click on "Network Connections". From the panel on the left, click on "Create a new connection". Windows will greet you with the "New Connection Wizard" as shown in the screen shot below. Click the "Next >" button to continue. 
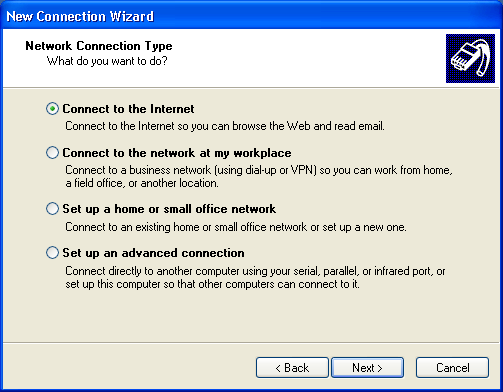
Windows will ask you about the "Network Connection Type". Select "Connect to the Internet" (see screen shot below). Click on the "Next >" button to continue. 
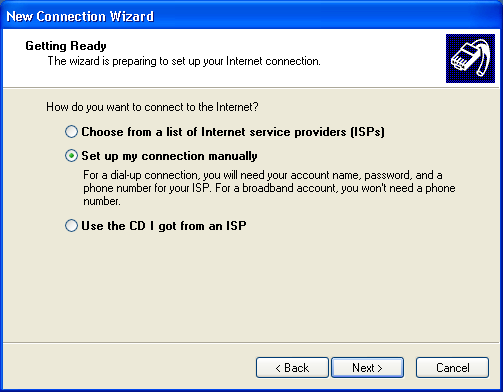
In the "Getting Ready" dialog box , select "Set up my connection manually" (see screen shot below). Click on the "Next >" button to continue. 
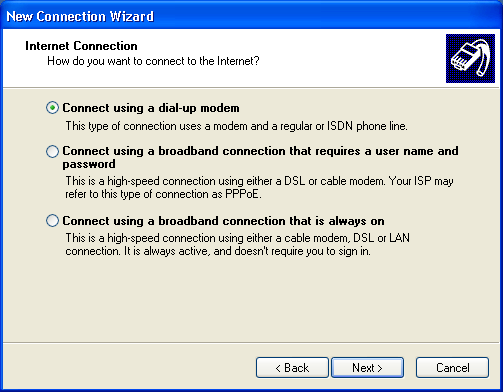
In the "Internet Connection" dialog box, choose "Connect using a dial-up modem" (see screen shot below). Click on the "Next >" button to continue. 
In the "Select a Device" dialog, check the "Modem - SAMSUNG CDMA Modem". Uncheck all other modem devices that may also show up in the list (see screen shot below). Ignore the "(COM4)" that showed up on my computer. It could be a different COM port on your computer. Click on the "Next >" button to continue. 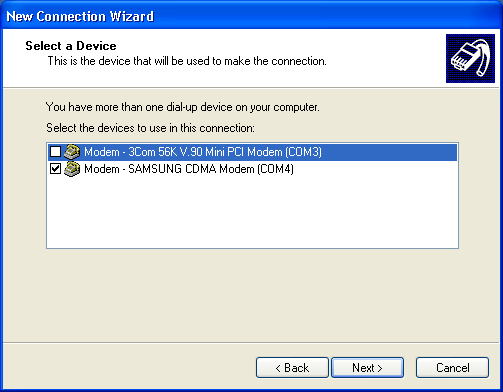
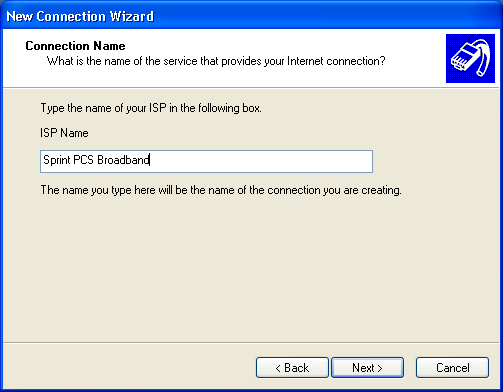
In the "Connection Name" dialog box, type in any connection name that you are comfortable with. I use "Sprint PCS" to indicate that this is a connection through the Sprint PCS service. I added "Broadband" to the end, because I have an older Sprint PCS cellphone that I can connect to, which connects via slower non-broadband speed. Thus, the name helps me figure out which cellphone I'm connecting with. Click on the "Next >" button to continue. 
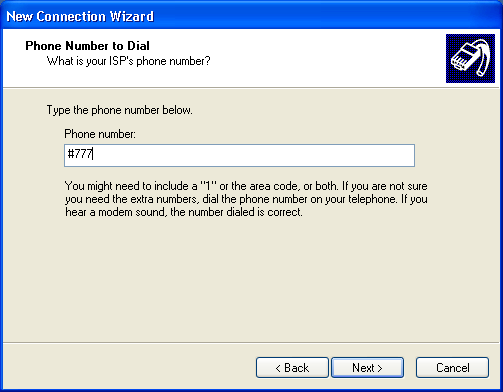
In the "Phone Number to Dial" dialog box, type in "#777" as shown in the screen shot below. Click on the "Next >" button to continue. 
In the "Internet Account Information" dialog, uncheck the only two check boxes (see screen shot below). They are "Use this account name and password when anyone connects to the Internet from this computer" and "Make this the default Internet connection". Leave the "Username" and "Password" fields blank. Click on the "Next > button to continue. 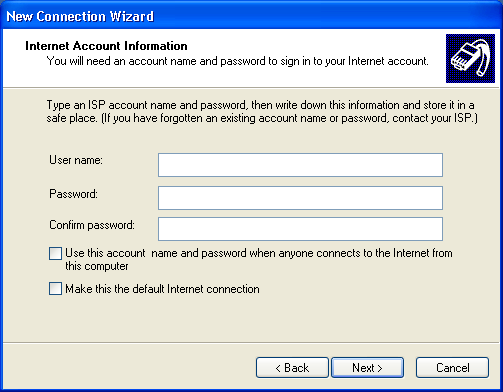
Now you are all done. In the final dialog box, you have the option to "Add a shortcut to this connection to my desktop" (see screen shot below). When you do, you will be able to easily access the network connection conveniently. Click on "Finish" to complete your dial-up set up. 
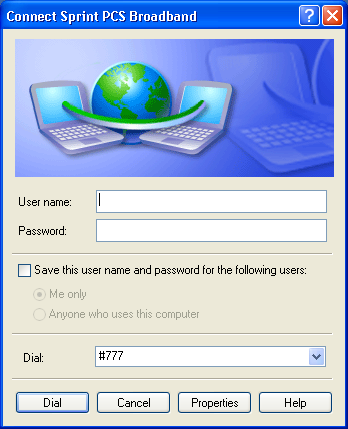
Connect to the InternetTo connect your cellphone and your computer to the Internet, open up the "Network Connections" from "Control Panel" again. Double click on the new network connection you have made in previous steps. If you have already created a short-cut for it, you can skip the "Control Panel" step and double-click that directly. The following dialog will pop-up on your screen. 
Do not fill in the dialog with any additional information. Simply click on the "Dial" button and you will be connected to the Internet. Disconnect from the InternetTo disconnect your computer and your cellphone from the Internet, find the network connection symbol on your Windows Taskbar. The little icon on the right-hand side of the Taskbar (see screen shot below). It looks like two computer monitors. It will not have a red 'x' on it, meaning it's connected. 
Once you find it, click on the network connection icon. It will bring up the status dialog as shown in the screen shot below. There is a "Disconnect" button on it. When you click on this button, you will disconnect the phone and the computer from the Internet. 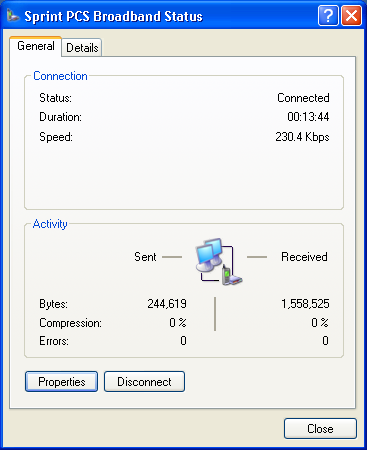
Related Links
Attachments
|
Articles
|
Wiki
226 Users Online
Get Our

|
|
Copyright © 2004 - 2025. All Rights Reserved. |
|


