|
Ultra 3.5" Mini Portable USB 2.0 / Firewire External Hard Drive EnclosureA little while back, I wanted to connect my media storage hard drive to my notebook computer through the Firewire port. So I started searching for a Firewire external hard drive case. When I saw the Ultra Mini Portable Disk enclosure, I was thrilled. Not only was the price right ($20 after rebate), it had both Firewire and USB ports. But I had some questions, such as whether the drive can be used on the USB if it has been formatted on the Firewire. Well, I shelled out $20 to answer the questions for myself. But you won't have to, because I documented my practical experience in this review. 
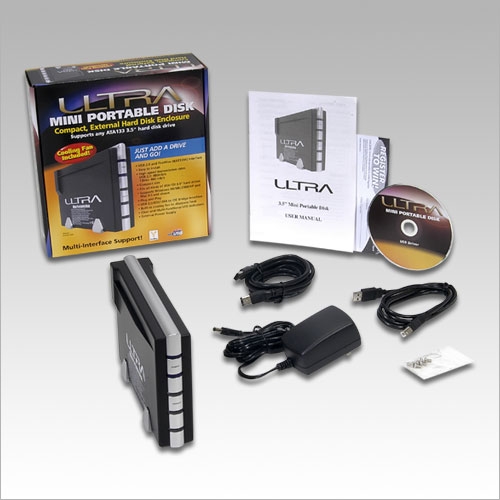
The Ultra Mini Portable Disk enclosure comes in a well packaged container. Although the device is marketed to be small, the company didn't skimp on the money by distribute it in a small package container. Instead, the enclosure comes in a full size box full of accessories. The box content includes the enclosure, driver disc, USB cable, Firewire cable, AC adapter, instruction manual, and warranty card. 
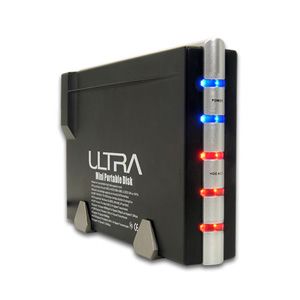
The enclosure is very light, most likely because it is made entirely out of plastic. Two feet screws onto the bottom of the enclosure allows it to stand vertically. You can place the enclosure horizontally on the desk. But it seems that stacking multiple enclosures is unstable. The enclosure has a built-in fan and ventilation. So I am not concerned that the enclosure is made out of plastic. There are five LED's on the front panel. Two blue LED's are for power. Two red LED's are for hard disk access. I have no clue what the fifth red LED is used for. 
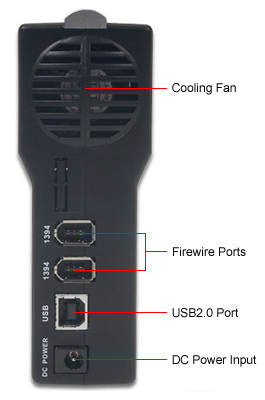
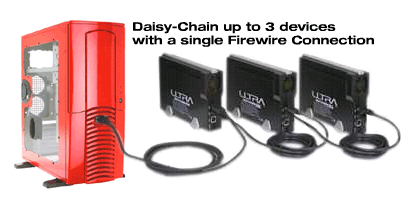
On the back, there is a DC power port, an USB port, and two Firewire ports. The enclosure provides two Firewire ports on the back, apparently you can daisy chain up to three of these enclosures. That will help save precious Firewire and USB ports on your computer. 
I wonder if you can chain any Firewire device, such as a digital camcorder or a different external Firewire hard drive. So I have tried daisy-chaining with my Sony Handycam (shown in the photo below); it works! DisassemblyTaking the enclosure apart proves difficult it you don't read instructions first. But it you read the instruction, you will realize that you have to unscrew and take the two feet off first (see photo below). The hardest part is prying the feet off after removing the screws. Once you have done that, you will realize that the enclosure splits apart easily from the bottom. With the enclosure apart, a circuit board with IDE (ATA) interface is revealed. The hard drive power cable and the IDE hard drive cable are real short to keep everything nice and tidy in this small enclosure. The hard drive fits just fine, leaving very little room left in the enclosure (see photo below). The hard drive is screwed into plastic tabs on the enclosure. I haven't crack the tabs myself, but I believe you can easily do that by over-tightening the screws. Putting the enclosure back together is easier than taking it apart. OperationAfter turning it on and plugging it into my notebook, my computer recognized it immediately in both Firewire and USB mode. I am glad that I can read and write to it no matter which interface I have on my computer. This feature makes the external hard drive truly portable. Related Links
Attachments
|
Articles
|
Wiki
209 Users Online
|
|
Copyright © 2004 - 2025. All Rights Reserved. |