|
 Attach
| Attach
|
 Edit
| Edit
|
 Revisions Revisions
 Related Content Related Content
Installing the Windows Device Driver for the Heltec V3 LoRa IoT Development Board
Are you having trouble connecting to the Heltec V3 board on Windows? If so, this article will help you step-by-step.
There are two possible reasons why your Heltec V3 board is not working with your Windows computer:
- Your USB Type-C cable provides charging capability only. Please see our "How to Determine If You have the Proper USB Type-C Data Cable for the Heltec V3 LoRa IoT Development Board?" article to make sure you have the proper USB Type-C data cable.
- Your Windows computer is missing the device driver needed to recognize the Heltec V3 board. This article will help you determine whether you have the device driver and help you install it if necessary.
Comments & Discussion >>
Determine Whether the Device Driver is Installed
Before installing the device driver, it's best to determine whether the device driver is already installed. Follow these steps to perform a quick check:
- Ensure the USB cable and the Heltec V3 board is not plugged into the Windows computer.
- Start "Device Manager" on your Windows computer. You can start it by searching for "Device Manager" in the Windows Start menu.
- Ensure that there is no "CP201x" related device(s) under the "Other devices" and "Ports (COM & LPT)" category.
- Plug the USB Type-C cable into the USB port on your Windows computer.
- Plug the USB Type-C cable into Heltec V3 board.
- Do you hear your computer make the typical sound when you plug in a USB device? If not, you probably don't have the right cable; please go through our "How to Determine If You have the Proper USB Type-C Data Cable for the Heltec V3 LoRa IoT Development Board?" article. If so, please continue with the next step.
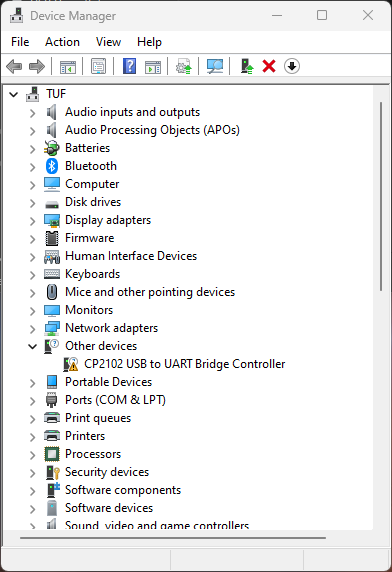
- Look under "Other devices" category in "Device Manager" and see if "CP2102 USB to UART Bridge Controller" shows up (see screen shot below). If so, your Windows computer is missing the device driver; please see the next "Install the Device Driver" section to install it. If you don't see that entry in "Other devices" category, follow the next step below.
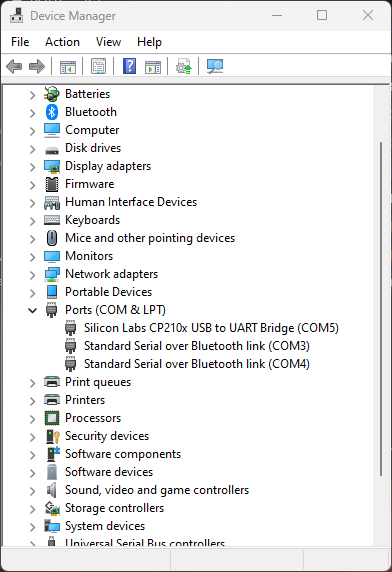
- Look under "Ports (COM & LPT)" category in "Device Manager" and see if "Silicon Labs CP210x USB to UART Bridge (COM5)" shows up (see screen shot below). The "COM5" could be any COM port available on your computer. If so, you already have the proper device driver; you may skip this article.
Comments & Discussion >>
Download the Device Driver
Before installing the device driver, you'll have to download it from the manufacturer. Silicon Labs, the manufacturer, provides the device driver on its "CP210x USB to UART Bridge VCP Drivers" web page.
The web page lists a number of different Windows drivers. We tried "CP210x Windows Drivers" on our Windows 11 system and it worked well for us. Other users have reported success with the "CP210x Universal Windows Driver". The rest of this article will provide step-by-step instructions for the "CCP210x Windows Drivers" method.
Comments & Discussion >>
Install the Device Driver
The device driver will be downloaded as a ZIP file. Modern Windows operating system has the ability to open the ZIP file. Perform the following step to install the device driver:
- Double-click the "CP210x_Windows_Drivers.zip" to open it.
- If you have a 64-bit Windows operating system, double-click the "CP210xVCPInstaller_x64.exe" to launch the 64-bit installer.
- If you have a 32-bit Windows operating system, double-click the "CP210xVCPInstaller_x86.exe" to launch the 32-bit installer.
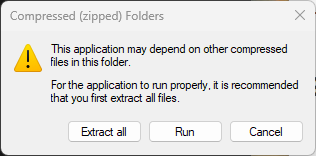
- After launching the installer, Windows will present the dialog in the following screen shot. The launcher will need other files in the ZIP file, so click the "Extract all" button to continue.
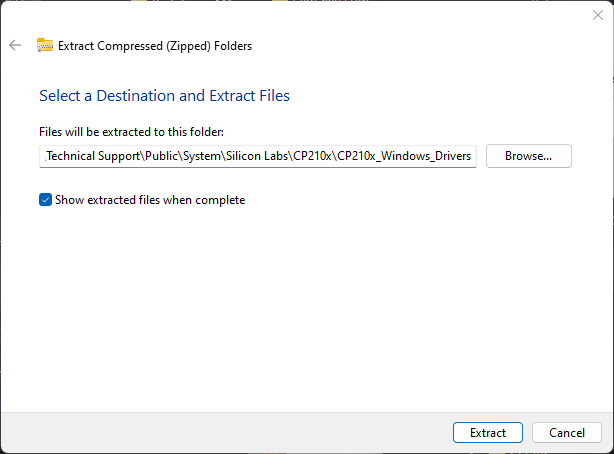
- Windows will ask you where to extract the files (see screen shot below). The default location is the same directory as the ZIP file, meaning it will create a new folder with the same name there. Click the "Extract" button to continue.
- After the files have been extracted, open the extracted folder and launch the installer again.
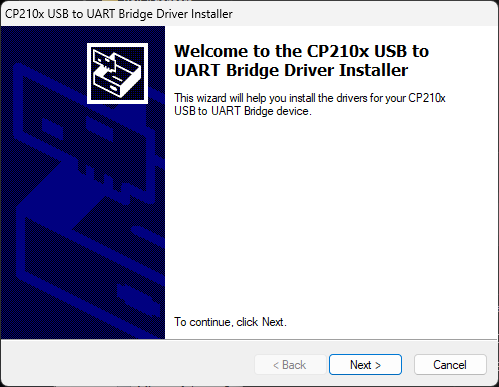
- You will be presented with the welcome screen as shown below. Click on the "Next >" button to continue.

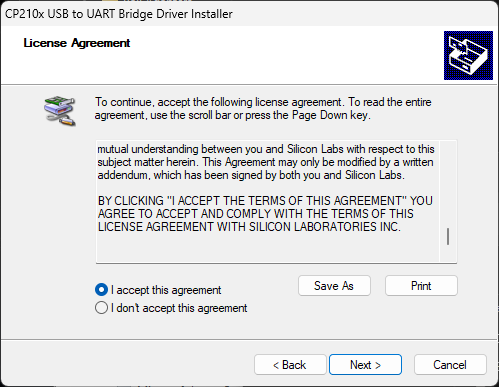
- You will be presented with the License Agreement as shown below. Select "I accept this agreement" and press the "Next >" button to continue.
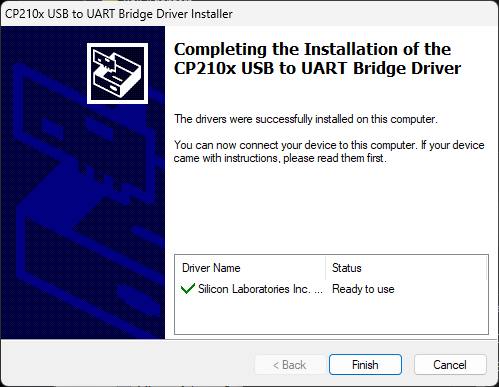
- Finally, the installation occurs very quick. You'll be presented with the completion screen shown below. Press the "Finish" button to continue.
At this point, if you check the "Device Manager" again, you should see Windows recognizing the device as a COM port:
Comments & Discussion >>
Related Links
Attach
|
Edit
|
Revisions
Related Content
Attachments
|
Articles
|
Wiki
Forums
|
Latest
|

Library
|
Links
|
News
Search
|
Store
|
Help
145 Users Online


Fun for Photographers


|
