Older Revision of Rytaki Laser Precision MMO Gaming Mouse R6 Review
Rytaki Laser Precision MMO Gaming Mouse R6 ReviewAbout a month ago, before this writing, my son snatched my Razer Naga MMOG Laser Gaming Mouse so that he can use the 12 programmable thumb buttons to build faster in Fortnite. So I purchased the Redragon M908 Impact MMO Gaming Mouse to replace it. I only used it for a week before my daughter saw how useful it was in Fortnite that she snatched my Redragon M908 Impact MMO Gaming Mouse. So I got on Amazon again to find get another replacement MMO gaming mouse. And that was when I spotted the Rytaki Laser Precision MMO Gaming Mouse R6.
Cross-Reference
The Rytaki Laser Precision MMO Gaming Mouse R6 looks really good on the Amazon product photos. But the real reason I have chosen this mouse over my prior favorites is that is has two programmable buttons next to the index finger button similar to the original Razer Naga MMOG Laser Gaming Mouse. In this article, I will provide a detailed review of the Rytaki MMO gaming mouse. The PackageThe package, for the mouse, comes in a cardboard box (see photo below). But the cardboard box seems more sturdy and retro-like. It's quite pleasing to look at. In fact, I have found myself unable to resist opening it right away. 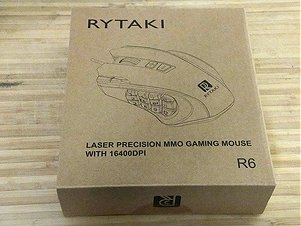
Upon opening the cardboard box, I have found a simple plastic container that contains the Rytaki Laser Precision MMO Gaming Mouse R6, a circular weight carrier, instruction manual, and a small CD for the programmable software. There is a set of extra teflon feet inside the circular weight carrier. The photo below shows the content. The instruction manual is thick and contains many different languages. The CD has no label, which is a little peculiar. 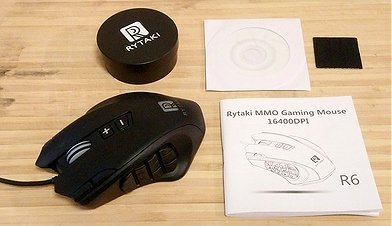
Look and Feel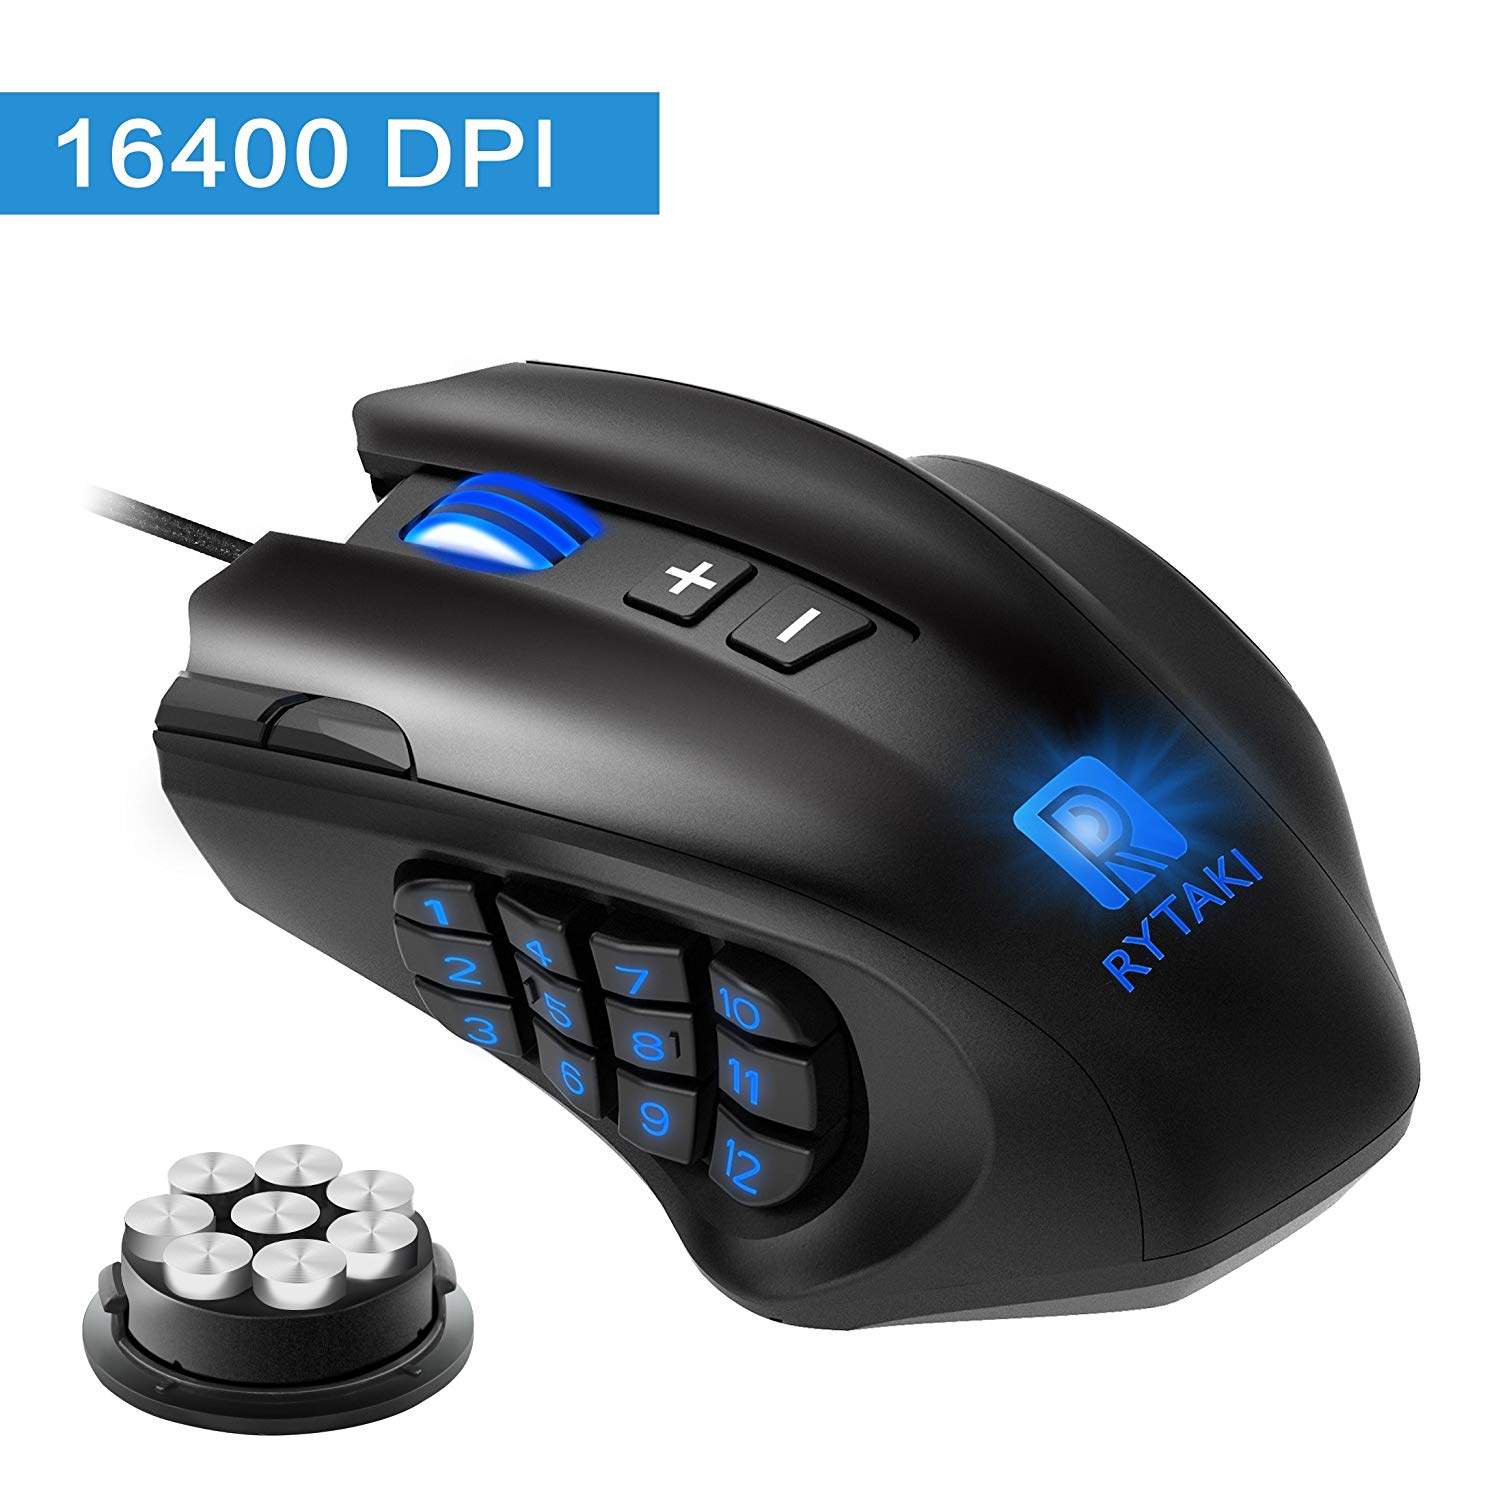
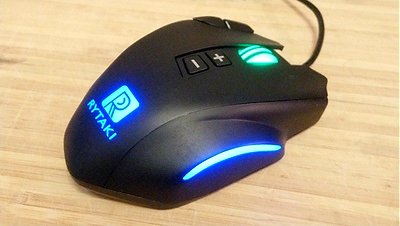
The product photo posted on Amazon (shown above) made the Rytaki Laser Precision MMO Gaming Mouse R6 look like it had really sexy curves with a rubber texture. But when I actually opened the box and took the mouse out, I found that it had neither. Instead, it had textured hard plastic surface with fairly flat click buttons (see photo below). The only sexy curves on the real mouse that matched the product photo is the curvature at the 12-programmable buttons. And I prefer rubber texture that are common on other gaming mice over the plastic texture. 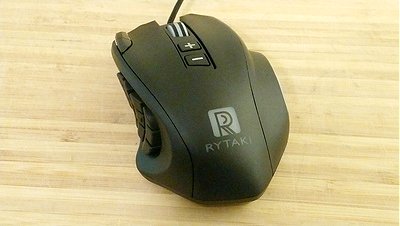
The white nylon looking plastic made the mouse look cheap. But those are the transparent ports for the lights, which will be reviewed in more detail in the "Lights" section below. On the other hand, the Rytaki Laser Precision MMO Gaming Mouse R6 is really solid and sturdy. Its plastic is heavyweight. The entire mouse feels like a man's gaming mouse. And having two programming buttons by the index finger really wins me over. I just prefer a slightly more refined gaming mouse. 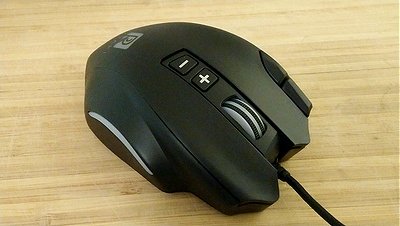
The Rytaki Laser Precision MMO Gaming Mouse R6 is just a tad smaller than the Redragon M908 Impact MMO Gaming Mouse and the UtechSmart Venus Laser Gaming Mouse (see photo below). And it's somewhat bigger than the Razer Naga MMOG Laser Gaming Mouse. I prefer the larger size of the former three mice over the smaller Razer Naga gaming mouse. 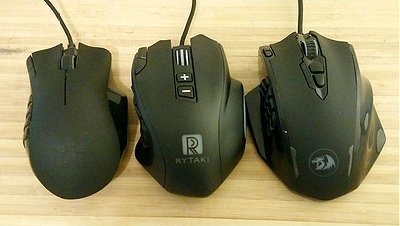
ButtonsOther than the typical two buttons and scroll wheel combination, the Rytaki Laser Precision MMO Gaming Mouse R6 also has four other buttons on top (see photo below). The plus and minus buttons, below the scroll wheel, allow you do change the Dots Per Inch (DPI) quickly. It's one of the few mice I own that allows me to change the DPI intuitively without referring to the instruction manual; I love it. Press the plus button to move up in resolution; vise-versa for the minus button. Unlike the UtechSmart Venus Laser Gaming Mouse and the Redragon M908 Impact MMMO Gaming Mouse with their four LED's next to the buttons, the Rytaki Laser Precision MMO Gaming Mouse R6 does not have LED indicators to show the selected DPI resolution. Instead, the scroll wheel light color changes to indicate the resolution selection. It's less intuitive than the other two mice. But once you get used to the colors, it's easy to see the resolution setting. Bonus is that unlike the other two mouse with five resolution settings, the Rytaki R6 mouse has six resolution settings. 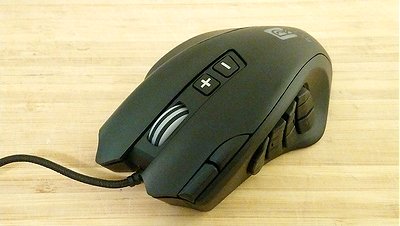
The two buttons to the left of the index finger button are programmable, which is virtually identical to the buttons on the original Razer Naga that I own. In League of Legends, I map the top button to health potion and map the bottom button to moving the pet. The original Razer Naga and the Rytaki R6 are both superior to the UtechSmart mouse and Redragon mouse in this area. These two buttons are also the primary reason I have selected this mouse for replacement. Because the new Razer Naga MMOG Laser Gaming Mouse does not have any buttons next to the index finger button, it is no longer a worthy contender to the Rytaki Laser Precision MMO Gaming Mouse R6. The photo below shows the twelve thumb buttons. To me they are the most important part of a gaming mouse. If you use a programmable controller on your left hand, which frees you from the keyboard, then you'll definitely need a mouse like this. These twelve programmable thumb buttons allow you to activate even more game functions. 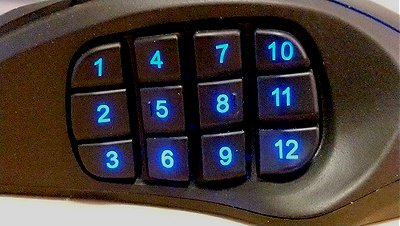
Unlike the other three 12 programmable thumb buttons mice I mentioned so far, the twelve buttons on the Rytaki R6 are bigger than my prior experiences. So I have to retrain myself a little bit to reach all twelve buttons in League of Legends. But so far it's not a hindrance. I have been able to move back and forth between all of these gaming mice without much fuss. But unlike the other three gaming mice, where the buttons are numbered bottom-to-top fashion to simulate left-to-right orientation, the Rytaki Laser Precision MMO Gaming Mouse R6 numbers the button top-to-bottom fashion, which simulates right-to-left orientation. Nevertheless, physical layouts are exactly the same among the four mice, so I was able to easily remap all the buttons to match the other three mice. Much like the manly exterior of the Rytaki Laser Precision MMO Gaming Mouse R6, its buttons requires strong assertion to push. There is no soft crisp clicks anywhere on this mouse. It's very unlikely to have any accidental activation of its buttons. The tactile feedback is excellent. Bottom CharacteristicsThe bottom of the Rytaki Laser Precision MMO Gaming Mouse R6 has the infrared laser port to track your mouse movements, an unlabeled button for you to change profiles, four sliding pads, and a rotating door for adjusting weights (see photo below). The mouse designer has made a mistake with the door markings. The open/close are in the opposite direction. I put two nicks in the coin slot trying to open the door based on the markings. But it opens the other way. 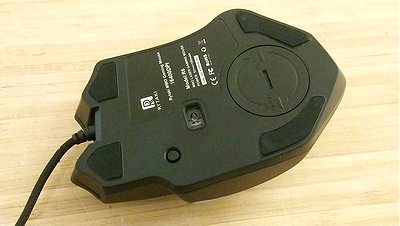
The package comes with eight weights in a separate circular container (see photo below). Each metal weight is 2.4g. Much like my experience with the UtechSmart Venus Laser Gaming Mouse and the Redragon M908 Impact MMO Gaming Mouse, I prefer the mouse to be as light as possible for the fastest gaming response. And I noticed that my hand is less tiring using a lighter mouse. So, I have not installed any of the weights into the Rytaki R6 gaming mouse. 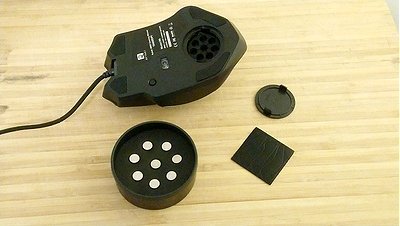
Programmable SoftwareThe Rytaki Laser Precision MMO Gaming Mouse R6 configuration software seems decently written. It never crashed out, though I did find one bug and ease of use issues.
As soon as you open the configuration software, you are presented with the mouse and its key mappings (see screen shot below). A line pointing to the button for each configurable setting makes it easy for you to see which mouse button you are configuring. 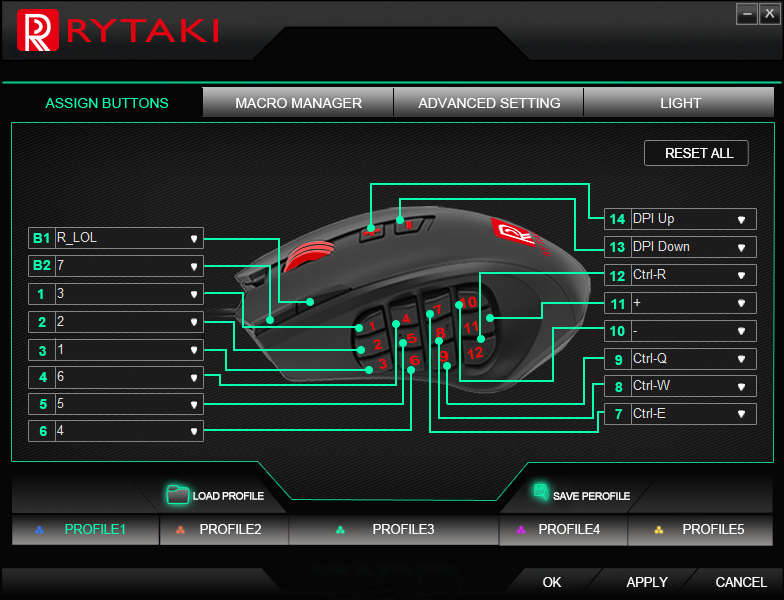
The configuration software allow you to remap each mouse button to one of the following fuctions. The only buttons you can't remap is the left mouse button, scroll wheel button, and the right mouse button.
The "Assign a Shortcut" function maps any keyboard key to the mouse button. Though I have been unsuccessfully at assigning a CTRL, ALT, or Shift combination key to a button. Instead, I have been forced to use macro for them (see "Macro Manager" later in this article). You can set up five profiles for the Rytaki R6 mouse. Then use the profile toggle button underneath the mouse to switch between profiles. The software will update the key mapping display as you press the physical button. The software lacks the ability for you to name the profiles. So I have a hard time remembering which profile is for what game. I have come up with a way to work-around this deficiency. Create a macro containing the name of the game. Then assign it to the first button setting. In the screen show above, you can see I have assigned "R_LOL" to the first button setting. "LOL" stands for "League of Legends". The Rytaki configuration software also allow you to save and load profiles. That's one way to get around the 5 profiles limit. And it's always a good idea to save your profile for backup in case your computer ever get wiped. Once you have mapped the mouse buttons to your liking, click the "APPLY" button on the bottom lower right corner of the software to send it to the mouse. The Rytaki R6 mouse has memory to store the profiles on board. So once the mouse has been programmed, you can use the mouse on any computer without the configuration software. There is a bug here. I have found that you have to apply the settings twice for your changes to take effect. Not a big deal, but a little annoying. ResolutionThe Rytaki Laser Precision MMO Gaming Mouse R6 has a laser sensor that is sensitive up to 16400 DPI. That's three times more sensitive than older gaming mice. But nowadays, 16400 DPI is common to most gaming mice. You can set the DPI under the "ADVANCED SETTING" tab in the configuration software (see screen shot below). 
Most programmable gaming mouse that I've used lets you set five DPI settings. The Rytaki R6 goes one step further to provide six configurable settings. By default, the the five setting are set to 800, 1600, 3200, 4800, 8200, and 16400 DPI. The lowest setting is 100 DPI. You configure the setting by dragging the DPI bar on the left side of the numbers. Therefore, it can be a little hard to get the exact number if you are picky with the exact resolution. I would have preferred to be able to enter an exact number in the box, but the software doesn't let you do that. LightsLike many other gaming mouse on the market, the Rytaki Laser Precision MMO Gaming Mouse R6 has colorful light display. But unlike other gaming mouse where you only get one to a few colors to choose from, the Rytaki R6 allow you to program it with any color in the visible spectrum. The screen shot below shows the full settings. Much like the DPI setting bars, you can only set the RGB color by dragging the bars. You can't type the exact number into the text boxes. 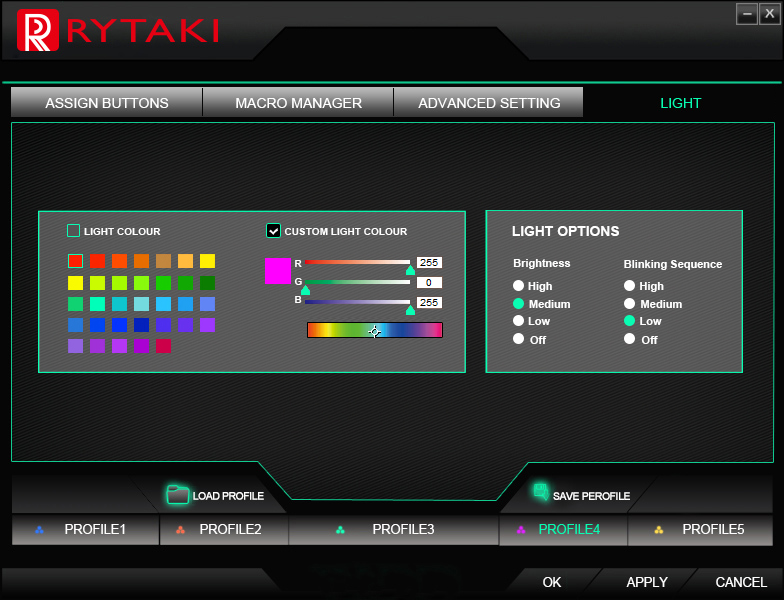
The configuration software also allows you to change the brightness level. You can turn the light completely off. The configuration software also allows you to change the blink rate, which they title it as "Blinking Sequence". You can turn off the blink and keep the light show on all the time. I preferred to set the brightness to medium and the blink rate to low; they match the brightness and blink rate of other gaming mice on my desk. The color, blink rate, and brightness only applies to the logo, the strip on the right side, and the 12 thumb buttons (see photos below). These settings have no effect on the scroll wheel light, which is always on to indicate DPI setting. 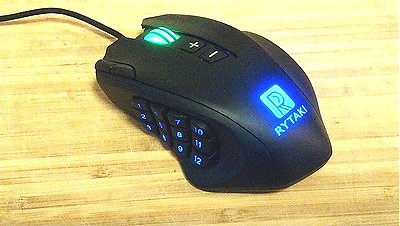
Macro ManagerRelated Links
|
Articles
|
Wiki
207 Users Online
Get Our

|
|
Copyright © 2004 - 2025. All Rights Reserved. |
|