|
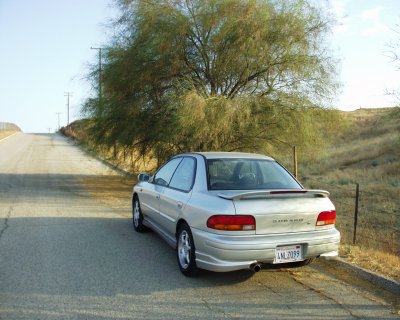
C-West Rear Bumper Fins Installation Instructions Attached Image: Chieh Cheng The instructions provide step-by-step procedure on installing the C-West fins on an US model Subaru Impreza 2.5 RS (1999 - 2001 GC6, GM6, GC8). However, it does not include prepping, sanding, priming, and painting the fins. The fins should be fully painted before installation, unless you want to black plastic look. Remember to wash and clean the rear bumper before fitting and attaching the fins. Tools Required
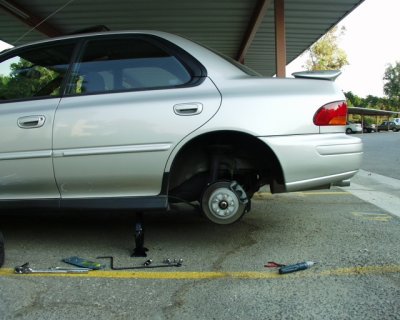
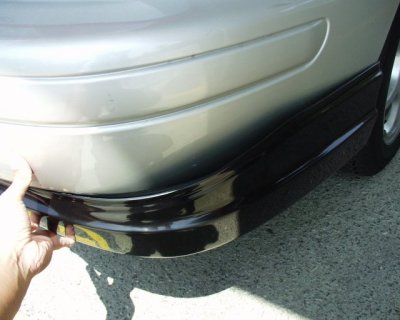
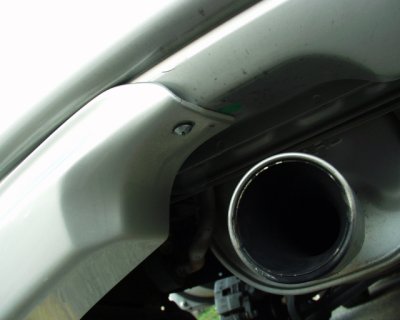
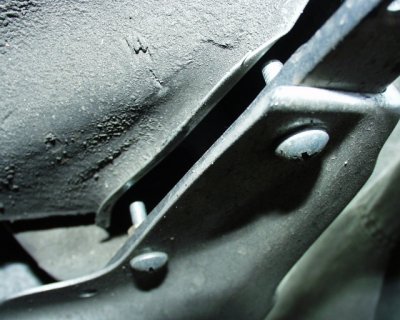
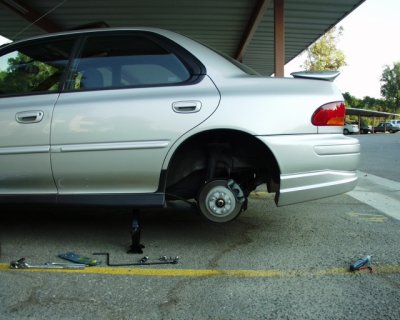
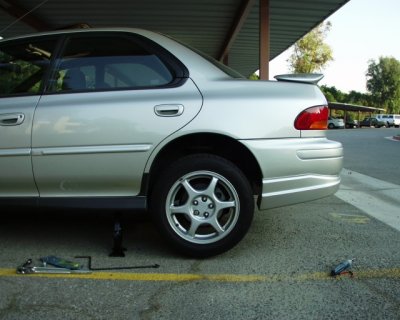
Installing the Fins First thing to do is to jack up the car. Then pull off the wheel. You will need to take the wheel off in order to drill new holes in the rear bumper and fin. Attached Image: Chieh Cheng The fins come with pre-drilled screw holes. The front end has two holes that match the holes in the rear bumper exactly. However, if you use these factory holes, you will find that the fins do not fit the factory bumper. You can see the big gap in the picture below. The factory bumper does not include holes for the back of the fins. You will have to drill these holes. Attached Image: Chieh Cheng To get the fins to fit, we have to drill two new holes on the bumper and one new hole on the fin, for each side. Before fitting the fins, attach the double-sided tape along the edge of the fins. The tape will allow you to fit the fins for drilling. I made the mistake of not attaching the tape for fitting the first fin and ended up with a slight gap. Re-align the fin so that top hole on the fin is about one inch below the top hole on the bumper. With the front of the fin in this position, the back of the fin slides into place easily. Now that you know how you want the fin to fit, peel off the paper for the double-sided tape and attach the fin permanently. Note the position of the hole on the backside of the fin. Drill a hole into the rear bumper right above the hole on the fin. To keep the fin in position while you work on the front, screw in the back of the fin. Push the screw and washer through the fin and the bumper. Reach in, under the car, with your other hand to screw in the washer and the hex nut on the other side. Use the needle-nose pliers and the philip-head screwdriver to tighten the screw and nut. Attached Image: Chieh Cheng With the fin in place, drill a new hole in the rear bumper to match the top hole on the fin. You also need to drill a bottom hole on the fin to match the bottom hole on the rear bumper. You can feel for the bottom bumper hole with your finger and eyeball it by sticking your head into the wheel well. Once the holes are drilled you are ready to attach the front screws. Attached Image: Chieh Cheng Poke the screw and washer through the top holes. Stick your head into the wheel well so that you can see both sides of the holes. You will need to use the needle-nose pliers to place the second washer on the screw thread. And use the needle-nose pliers to hold the hex nut, while screwing the screw into the nut. Tighten with the screwdriver and needle-nose pliers. Repeat instructions in this paragraph for the bottom holes. Attached Image: Chieh Cheng When you are done attaching the fin. Re-attach the wheel and torque the wheel to the force specified in the instruction manual of your car. I torque\'ed mine to 70 ft/lbs. Lower the car and repeat the entire instruction set for the other side. Attached Image: Chieh Cheng Once you are done with both sides, enjoy the new look. 8-) Attached Image: Chieh Cheng
Did your message disappear? Read the Forums FAQ. Add Comment
TrackBackTrackBack only accepted from WebSite-X Suite web sites. Do not submit TrackBacks from other sites.
No TrackBacks yet. TrackBack can be used to link this thread to your weblog, or link your weblog to this thread. In addition, TrackBack can be used as a form of remote commenting. Rather than posting the comment directly on this thread, you can posts it on your own weblog. Then have your weblog sends a TrackBack ping to the TrackBack URL, so that your post would show up here. Messages, files, and images copyright by respective owners. |
Articles
|
Wiki
280 Users Online 

|
|
Copyright © 2004 - 2024. All Rights Reserved. |
|